Unleash Restaurant-Style Flavor: Your Guide to Crispy Homemade Tortilla Chips
Imagine a basket of warm, perfectly crispy tortilla chips, glistening with just the right amount of salt, ready to scoop up your favorite salsa or guacamole. This isn't just a dream reserved for your local Mexican restaurant; it's a culinary reality you can easily achieve in your own kitchen! Making
homemade tortilla chips is not only incredibly simple but also yields a flavor and texture far superior to anything you'll find in a bag. Whether you prefer the classic fried indulgence, a lighter baked version, or the quick convenience of an air fryer, this comprehensive guide will equip you with all the tips and tricks to create dangerously addictive chips that will elevate any dip or appetizer spread.
Why Homemade Tortilla Chips Are a Game-Changer
If you've ever settled for store-bought tortilla chips, you know they often fall short. They can be bland, overly brittle, or lack that satisfying crunch and robust flavor that truly fresh chips deliver.
Homemade tortilla chips, on the other hand, are a revelation. They transform a simple snack into an experience.
*
Unrivaled Freshness: There's simply no comparison to a chip made moments before it's served. The aroma, the warmth, the perfect crispness – it's all part of the magic.
*
Superior Texture: These chips are designed to withstand the weight of even the thickest dips. They're sturdy yet delightfully crunchy, creating a golden bubble effect when perfectly cooked that's both appealing and adds to their incredible mouthfeel. No more broken chips left behind in your guacamole!
*
Customizable Flavor: You control the saltiness, ensuring every chip is seasoned exactly to your liking. Flaky sea salt, in particular, adheres beautifully and provides a delightful burst of flavor.
*
Economical and Easy: With just three basic ingredients – corn tortillas, oil, and salt – you can create a bounty of chips for a fraction of the cost of premium bagged varieties. The process is straightforward, requiring minimal fuss.
As seasoned recipe developers attest, the difference between a truly crispy chip and a chewy or oily one often comes down to small, expert-approved tricks. This method works universally for various tortilla types and cooking methods, ensuring your chips are always a success.
The Foundation: Essential Ingredients and Perfect Prep
Before you dive into cooking, let's talk about what you need and how to prepare your tortillas for optimal chip perfection.
Choosing Your Tortillas and Oil
The quality of your chips begins with your ingredients.
*
Corn Tortillas: While you can experiment with white, yellow, blue, or even homemade corn tortillas, the key is often in their thickness and freshness.
Extra thin corn tortillas are highly recommended, as they allow for thorough cooking and unparalleled crispiness. If possible, opt for day-old or slightly stale tortillas. Tortillas with less moisture will fry or crisp up more effectively, preventing a chewy texture. Fresh, extra-thin tortillas can still work wonderfully, but a little pre-drying can sometimes help.
*
Oil: For frying, a neutral, high-heat oil is essential. Options like canola, vegetable, peanut, or avocado oil are excellent choices as they can reach the necessary temperature without imparting unwanted flavors. For baking or air frying, a light spray or brush of oil will suffice.
*
Salt: Don't underestimate the power of salt! Flaky sea salt is ideal because its irregular crystals adhere beautifully to the hot, fresh-from-the-cooker chips, providing bursts of savory flavor. Fine-grained salt works too, but flaky salt adds a gourmet touch.
Preparing Your Tortillas for Cooking
This step is quick and simple, but crucial for uniform results.
*
Cutting: Lay your tortillas flat and slice them into 4 or 6 even wedges. For thinner, lighter chips (and more of them!), you can even go for 8 wedges per tortilla. Consistency in size helps ensure even cooking across your batch. Some find a combination of sizes adds variety – just ensure the pieces aren't too small or too large.
*
Drying (Optional but Recommended): If using very fresh tortillas, you can lay them out on a clean counter or baking sheet for 30 minutes to an hour to air dry slightly. This reduces moisture, contributing to a crispier final product, especially for baked or air-fried chips.
Mastering the Methods for Crispy Perfection
Whether you're after the classic restaurant experience or a healthier alternative, there's a method for you.
The Classic Fried Method: For Unparalleled Restaurant-Style Chips
For many, frying is the gold standard for
homemade tortilla chips, delivering that authentic golden crispness and satisfying bubble.
1.
Preheat Your Oil: Pour about 1 quart of your chosen neutral oil into a heavy-bottomed pot or Dutch oven. Heat the oil to
350°F (175°C). A deep-fry thermometer is invaluable here for accuracy; consistent temperature is key to avoiding greasy or soggy chips.
2.
Fry in Batches: Carefully add a single layer of tortilla wedges to the hot oil. Do not overcrowd the pot, as this will drop the oil temperature and lead to soggy chips. Fry for up to 2 minutes, turning them halfway through with tongs, until they are beautifully golden brown and crisp. You'll notice them firming up and forming those characteristic bubbles.
3.
Drain and Salt Immediately: As soon as the chips are golden and crisp, remove them from the oil using a slotted spoon or spider. Transfer them directly to a wire cooling rack set over a baking sheet (preferred for maximum crispness) or a paper towel-lined plate. Immediately sprinkle generously with salt. The heat and residual oil will help the salt adhere perfectly.
4.
Repeat: Continue frying in batches until all your tortillas are transformed into glorious chips.
For more detailed frying nuances and to truly understand the alchemy of creating these delectable chips, explore
Crispy Homemade Tortilla Chips with 3 Simple Ingredients.
The Baked Method: A Lighter, Healthier Alternative
If you're seeking a less oil-intensive option, baking produces wonderfully crisp chips with a lighter feel.
1.
Preheat Oven & Prep Tray: Preheat your oven to
375°F (190°C). Arrange your cut tortilla wedges in a single layer on a large baking sheet. A non-stick sheet or parchment paper is helpful.
2.
Lightly Oil: Lightly brush or spray both sides of the tortilla wedges with oil. This helps them crisp up and prevents them from drying out too much.
3.
Bake Until Golden: Bake for 8-12 minutes, flipping them halfway through, until they are golden brown and crispy. Keep a close eye on them, as baking times can vary and they can go from perfectly golden to burnt quickly.
4.
Salt: As soon as they come out of the oven, transfer them to a wire rack and sprinkle with salt while they are still hot.
The Air Fry Method: Quick, Convenient, and Crispy
The air fryer offers a fantastic blend of speed and health-consciousness, delivering surprisingly crisp results.
1.
Preheat Air Fryer & Oil: Preheat your air fryer to
350°F (175°C). Lightly spray your tortilla wedges with oil.
2.
Arrange in Basket: Place a single layer of oiled tortilla wedges in your air fryer basket. Do not overcrowd. You'll likely need to work in several batches.
3.
Air Fry: Cook for 3-5 minutes, shaking the basket or flipping the chips halfway through, until they are golden and crisp. Air fryer models vary, so adjust time as needed.
4.
Salt: Transfer the hot chips to a bowl or wire rack and salt immediately.
Tips for Perfection and Elevating Your Serving Game
Achieving consistently perfect
homemade tortilla chips involves a few key details and knowing how to serve them right.
Ensuring Ultimate Crispiness Every Time
*
Thin Tortillas are Gold: Always choose extra-thin corn tortillas. They cook through faster and are less likely to be chewy.
*
Embrace Stale: Day-old or slightly dried tortillas contain less moisture, which is the enemy of crispiness.
*
Mind the Temperature (Frying): If your oil isn't hot enough, chips will absorb too much oil and become greasy. If it's too hot, they'll burn before crisping. A thermometer is your best friend.
*
Don't Overcrowd: This applies to all methods. Give your chips space to breathe and cook evenly.
*
Salt Hot: This cannot be stressed enough. Salt must be applied while the chips are still hot from the oil/oven/air fryer to properly adhere.
Reusing Frying Oil: A Smart Practice
If you've used clean oil for frying your chips, don't discard it! You can reuse it for several more rounds of frying.
*
Cool Completely: Let the oil cool completely in the pot.
*
Strain: Carefully strain the cooled oil through a fine-mesh sieve (or cheesecloth) into a clean, airtight container to remove any food particles.
*
Store Properly: Refrigerate the oil for up to 3 months, or store at room temperature for 1-2 months. Refrigeration is generally preferred for extended shelf life.
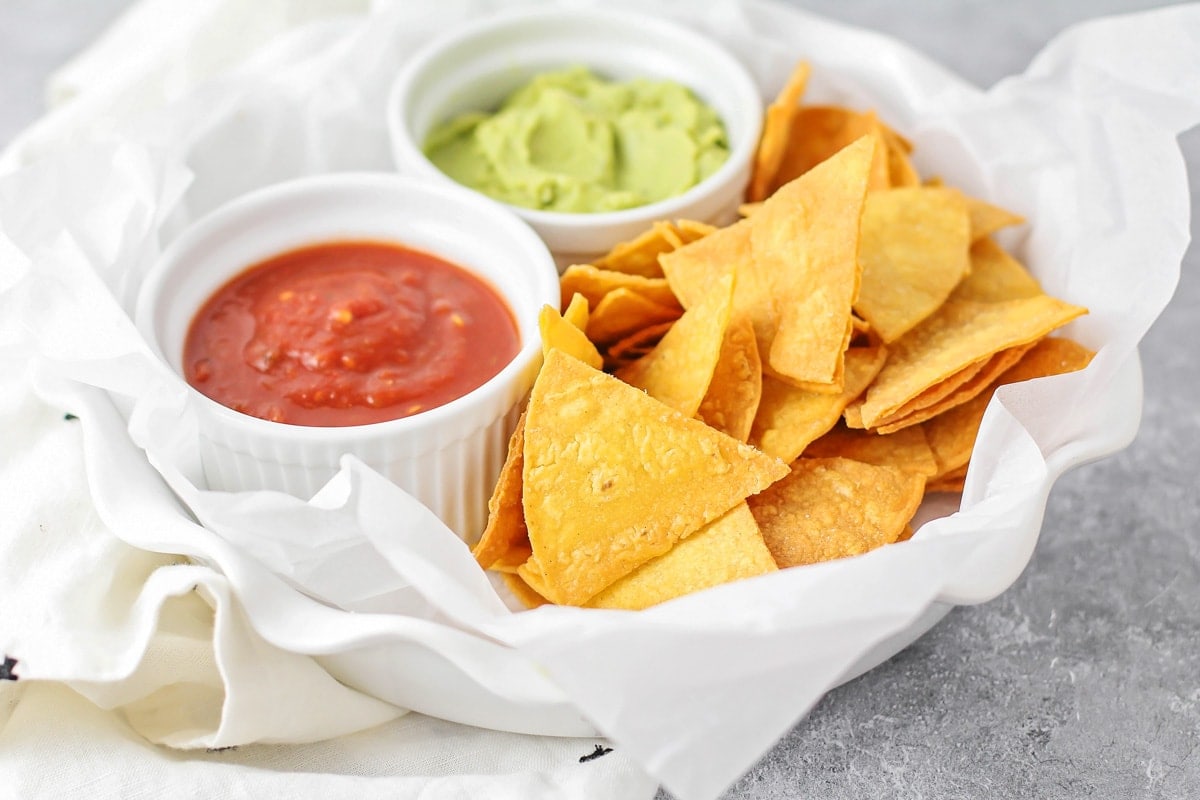
Serving Your Homemade Masterpiece
Once your chips are perfectly crispy and seasoned, it's time to bring them to the table. These chips are a blank canvas for flavor and pair exquisitely with an array of dips and dishes.
*
Classic Dips: The obvious choices are often the best. Serve with your favorite homemade salsa, a rich, creamy guacamole, or a hearty bean dip.
*
Creamy Additions: A dollop of sour cream or crema can add a lovely tang and cool contrast, especially if you're serving spicy salsa.
*
Beyond Dips: Crumble them over salads, use them as a crunchy topping for chili or soup, or create your own epic nachos. The possibilities are endless!
These chips don't just accompany your dips; they elevate them. For ideas on pairing them with the perfect accompaniments, check out
Best Homemade Tortilla Chips: Elevate Your Salsa & Guac.
Conclusion
There's no need to settle for mediocre bagged chips when the world of restaurant-quality
homemade tortilla chips is so easily accessible. With just a few simple ingredients and your choice of frying, baking, or air-frying, you can create perfectly crisp, salty, and incredibly flavorful chips that will impress everyone who tries them. From elevating your favorite dips to being a star snack all on their own, mastering the art of homemade tortilla chips is a culinary skill that keeps on giving. So, grab some tortillas, get cooking, and prepare to take your snacking experience to an entirely new, deliciously crispy level!