Best Homemade Tortilla Chips: Elevate Your Salsa & Guac
Imagine biting into a warm, perfectly crisp tortilla chip – golden, slightly bubbly, and seasoned just right. Now, imagine that chip wasn't from a bag, but fresh from your own kitchen, ready to scoop up a generous dollop of creamy guacamole or zesty salsa. This isn't just a dream; it's the reality of making your own
homemade tortilla chips. Far superior to their store-bought counterparts, these culinary gems transform any snack or appetizer into a truly special occasion.
The secret to restaurant-quality chips lies in simple ingredients and a few expert techniques, promising a gratifying crunch and robust flavor that will make you wonder why you ever bought them pre-made. Whether you're a seasoned chef or a kitchen novice, mastering homemade tortilla chips is an incredibly rewarding endeavor that will permanently elevate your dip game.
Why Homemade Tortilla Chips Reign Supreme
Once you experience the unparalleled taste and texture of
homemade tortilla chips, there’s truly no turning back. They offer a distinct advantage over bagged varieties that simply cannot be replicated.
*
Unrivaled Freshness and Flavor: Store-bought chips often taste stale or flat in comparison. Homemade chips, on the other hand, are bursting with fresh corn flavor, complemented by the perfect amount of salt, creating an addictive combination. The difference is as stark as fresh bread versus packaged.
*
Superior Crispiness and Sturdiness: Forget soggy or brittle chips that crumble under the weight of a hearty dip. Properly made
homemade tortilla chips are incredibly sturdy, designed to withstand even the thickest guacamole or the most robust bean dip. Yet, they maintain an airy crispness that shatters beautifully with every bite, creating a satisfying auditory and textural experience.
*
Customization at Your Fingertips: From the type of corn tortilla (white, yellow, or even blue) to the cut (wedges, strips, or even triangles) and the seasoning, you have complete control. Want them saltier? Add more. Prefer a hint of lime or a dash of chili powder? It’s all possible. This level of personalization is simply not an option with mass-produced chips.
*
Cost-Effective and Simple: Made with just three core ingredients – corn tortillas, oil, and salt – homemade chips are surprisingly economical. Plus, the process is straightforward, requiring minimal active time and yielding impressive results. You'll be amazed at how quickly you can turn a humble stack of tortillas into a basket of golden deliciousness.
The Essential Ingredients for Perfect Homemade Tortilla Chips
Creating the best
homemade tortilla chips starts with a mindful selection of foundational ingredients. Each plays a crucial role in achieving that coveted restaurant-style crispiness and flavor.
1.
Corn Tortillas: The Foundation
*
Type: While any corn tortilla will work, opt for
extra-thin corn tortillas if you can find them. Their reduced thickness ensures they cook through more uniformly, resulting in a supremely crispy chip rather than a chewy one.
*
Freshness Matters (or Lack Thereof!): Surprisingly,
day-old or slightly stale tortillas are often preferred. With less moisture content, they fry or bake up crispier and more quickly. However, fresh tortillas, especially thin ones, will still yield excellent results. Feel free to experiment with white, yellow, or even blue corn varieties for different flavor nuances and visual appeal.
2.
Oil: The Crisp-Maker
*
Neutral, High-Heat Oils: Choose an oil with a high smoke point and a neutral flavor profile that won't overpower the delicate corn taste. Excellent choices include vegetable oil, canola oil, peanut oil, or avocado oil.
*
Temperature Control: Maintaining the correct oil temperature (ideally 350°F or 175°C for frying) is paramount. Too cool, and your chips will absorb too much oil and become greasy; too hot, and they'll burn before they crisp up inside.
3.
Salt: The Flavor Enhancer
*
Flaky Sea Salt: This is the secret weapon for restaurant-quality chips. Flaky sea salt has larger crystals that adhere beautifully to the hot chips and provide a delightful pop of salinity with every bite, much more so than fine table salt.
*
Timing is Everything: Always salt your chips immediately after they come out of the fryer, oven, or air fryer. The residual heat and oil on the chips allow the salt to stick and absorb effectively, ensuring even seasoning.
Optional Flavor Boosters:
While salt is essential, don't hesitate to get creative. A sprinkle of chili powder, a dash of smoked paprika, or a squeeze of fresh lime juice immediately after salting can add another layer of deliciousness to your
homemade tortilla chips.
Mastering the Art of Making Homemade Tortilla Chips (Fried Method Focus)
While there are multiple ways to make crispy
homemade tortilla chips, the fried method consistently delivers that golden, bubbly, and intensely satisfying restaurant-style experience. For a comprehensive guide covering all three popular methods, be sure to check out our article on
Restaurant-Style Homemade Tortilla Chips: Fry, Bake, Air Fry.
Preparation: Slicing Your Tortillas
Start by preparing your tortillas. Stack 6-8 tortillas and slice them into even wedges.
*
4 Wedges: For larger, sturdier chips perfect for hearty dips like bean dip or loaded nachos.
*
6 Wedges: A classic, versatile size, ideal for most salsa and guacamole scooping.
*
8 Wedges: For thinner, lighter chips that are incredibly delicate and airy.
Feel free to mix and match sizes to create a dynamic basket of chips!
Frying for Flawless Crispiness
1.
Preheat the Oil: Pour about 1 quart of your chosen neutral oil into a heavy-bottomed pot or Dutch oven. Heat it to a consistent 350°F (175°C). Use a candy thermometer or deep-fry thermometer to monitor the temperature accurately.
2.
Fry in Batches: Carefully slide a single layer of tortilla wedges into the hot oil. Do not overcrowd the pot, as this will drop the oil temperature and lead to greasy, less crispy chips. Fry about 8-10 wedges at a time, depending on your pot size.
3.
Cook Until Golden: Fry for 1 to 2 minutes per batch, turning the chips halfway through with tongs or a spider strainer. You're looking for a beautiful golden-brown color and visible bubbles on the surface, indicating they're cooking through and crisping up. They should feel firm, not pliable.
4.
Drain and Salt Immediately: Once golden and crisp, remove the chips from the oil and place them on a wire cooling rack set over a baking sheet, or on a plate lined with paper towels, to drain any excess oil. Crucially,
sprinkle generously with salt immediately while they are still hot and glistening. This ensures the salt adheres perfectly and permeates the chip for optimal flavor.
5.
Repeat: Continue frying in batches until all your tortillas are transformed into glorious chips. Allow each batch to cool slightly before serving.
Troubleshooting Common Frying Issues:
*
Greasy Chips: Your oil temperature was likely too low. Ensure it's at 350°F before adding chips.
*
Chewy Chips: The chips didn't cook long enough, or your tortillas might have been too thick or moist. Extra-thin or day-old tortillas help here.
*
Burnt Chips: The oil was too hot, or you cooked them too long. Keep a close eye on them, as they can go from golden to burnt quickly.
Beyond Frying: Baked & Air-Fried Homemade Tortilla Chips
While frying often yields the most "authentic" restaurant-style chip, baking and air frying are fantastic alternatives for those seeking a lighter option or simply preferring not to deep-fry.
*
Baked Homemade Tortilla Chips: To bake, preheat your oven to 375°F (190°C). Lightly brush or spray your tortilla wedges with oil and arrange them in a single layer on a baking sheet. Bake for 8-12 minutes, flipping halfway through, until they are golden and crisp. Remember to salt immediately upon removal from the oven.
*
Air-Fried Homemade Tortilla Chips: For the crispiest, hands-off approach, the air fryer is excellent. Preheat your air fryer to 350°F (175°C). Lightly spray tortilla wedges with oil and place them in a single layer in the air fryer basket (you'll need to work in batches). Air fry for 4-8 minutes, shaking the basket halfway through, until golden and crispy. Salt immediately.
Both baked and air-fried methods produce wonderfully crispy chips with less oil, making them a great choice for everyday snacking.
Elevate Your Dips: Serving Suggestions & Storage
Now that you've mastered the art of
homemade tortilla chips, it's time to unleash their full potential! These chips are not merely a vehicle; they are an enhancement to every dip and dish. Made with
Crispy Homemade Tortilla Chips with 3 Simple Ingredients, they form the perfect, versatile base for any culinary adventure.
Classic Pairings:
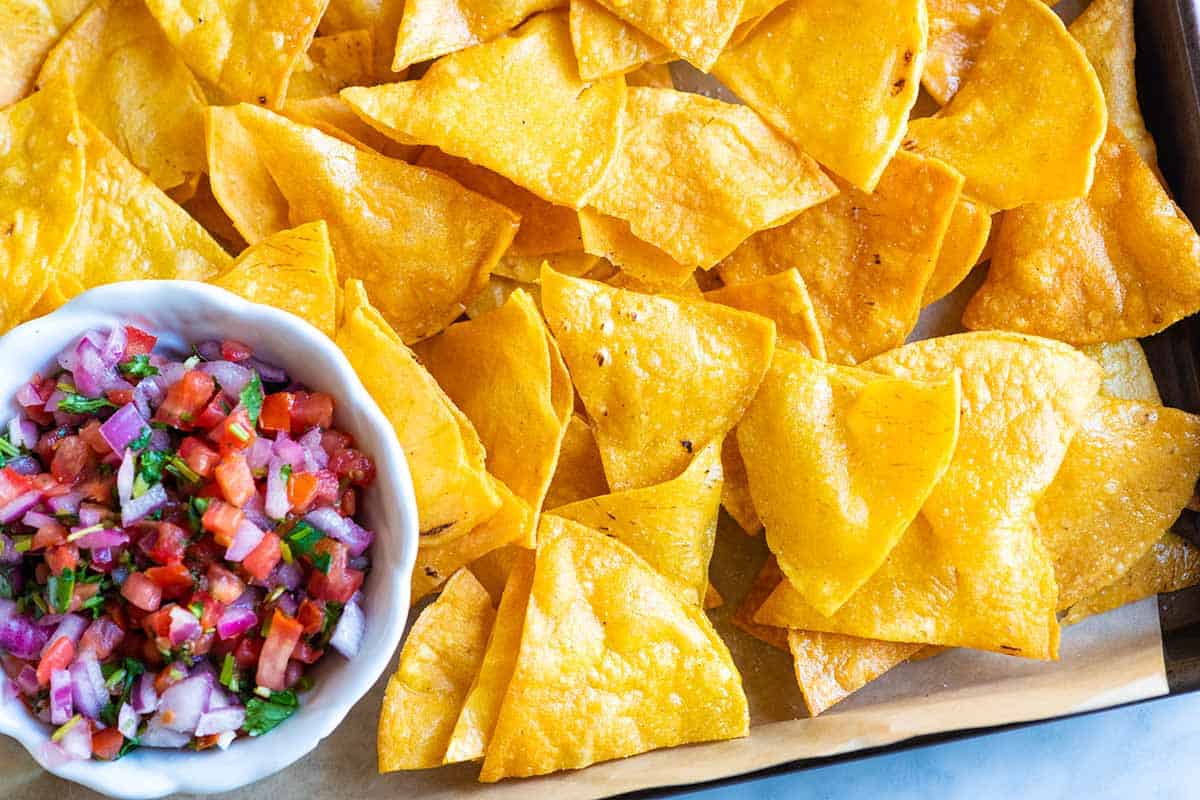
*
Fresh Homemade Salsa: The vibrant acidity and fresh flavors of a homemade pico de gallo or roasted salsa are perfectly complemented by the warm, salty crunch of your chips.
*
Creamy Guacamole: There's nothing quite like the combination of creamy, rich avocado and a perfectly crisp chip. The sturdiness of homemade chips makes them ideal for scooping generous amounts.
*
Hearty Bean Dip: Whether it's a simple refried bean dip or a layered seven-layer dip, your robust homemade chips will hold up to every delicious spoonful.
Creative Culinary Adventures:
*
Queso Fundido: Imagine dipping a still-warm chip into bubbling, cheesy queso – pure bliss.
*
Sour Cream or Mexican Crema: A simple dollop of cooling sour cream adds a delightful contrast, especially with spicy chips.
*
Ceviche: Use your chips as a crunchy bed for fresh, citrusy ceviche.
*
Nachos: Build the ultimate nacho platter using your own fresh chips as the base – they won't get soggy!
Storage Tips:
While best enjoyed fresh, you can store leftover
homemade tortilla chips. Once completely cooled, transfer them to an airtight container or zip-top bag at room temperature. They will remain wonderfully crispy for 2-3 days. Avoid refrigerating, as this can introduce moisture and make them soft. If they lose a bit of their crispness, a quick refresh in a 300°F (150°C) oven or air fryer for a few minutes will bring them back to life.
Reusing Frying Oil:
If you deep-fried your chips, you can definitely reuse the oil! Let it cool completely, then carefully strain it through a fine-mesh sieve or cheesecloth into a clean, airtight container. Store the filtered oil in the refrigerator for up to 3 months (my preferred method) or at cool room temperature for 1-2 months. This reduces waste and saves money!
Conclusion
There's a unique satisfaction that comes from creating something so simple yet so profoundly delicious in your own kitchen. Making
homemade tortilla chips is more than just a recipe; it's an experience that elevates your snacking, transforms your appetizers, and truly enhances every dip you serve. With just a few basic ingredients and a little know-how, you can achieve that addictive, restaurant-quality crispness and flavor that will have everyone reaching for "just one more." So, ditch the bag, grab your tortillas, and prepare to elevate your salsa and guacamole to extraordinary new heights!